DIY ice balls (18 photos)
Multi-colored ice balls can serve as excellent material for any art object. They can be simply scattered in the garden or yard, around the territory of a kindergarten, or you can build or decorate some kind of structure, make snowmen (especially if you freeze water in rubber gloves), etc. We decided to build a multi-colored pyramid of 400 ice balls.
We chose a city park as the location for our winter art object. Firstly, there are more children here, and secondly, there is a Sports Center nearby where you can get water for the balls. We talked with the heads of the organizations - they happily agreed to help us. Where did the idea come from? Surely, many have come across instructions for making ice balls with the addition of food coloring more than once.

According to the "recipe", everything turns out easy and simple. In reality, it turned out to be much more complicated. However, as always. Firstly, nowhere is it indicated how long it takes for the ball to freeze? How much water should be poured, what is the best coloring? It turned out, no matter how funny and trivial it may sound, but the ball is filled with water only under pressure - you won't be able to go outside with a funnel and a "one and a half liter" bottle. All that remains is a tap or a hose with water. Well, and a whole series of subtleties that we encountered in the process.
For example, the size - it is impossible to freeze a large-volume ball (3-4 liters). At t -20, only a layer of 5-6 centimeters freezes overnight. There is water inside. It also begins to freeze, but later, and pushes apart the ice "shell" - the ball cracks. It was also a mistake to bury the ball under the snow - in such a "house" it almost does not freeze.
Here is an example of a ball with a volume of 3 liters, which spent the whole night under the snow. In principle, the hemispheres turned out to be very "working" - you can use them as a vase for Christmas tree branches, or turn them upside down and place a lamp under it - it will look beautiful.

By trial and error, we decided to stop at balls measuring 10 * 10 - 15 * 15 centimeters. In the freezer, such frozen overnight.
So, we are sharing our method of making ice balls.
1. First of all, we prepared a concentrate of gouache - 1 can for 1.5 liters.

2. Using a funnel, pour the concentrate into the balloon "to the brim". You can use food coloring, in case there is a high probability that someone will decide to try the giant lollipops for taste. We took regular balloons. You can freeze balloons in the shape of Mickey Mouse, different animals, or rubber gloves (I personally froze a glove from a hair dye package - it turned out to be a funny hand that can be attached to a snowman on wet snow).

3. Then put it on the tap and "inflate". It is more convenient with two people: one holds the balloon to the tap, the other turns on/off the water. We tied the balloon without ropes and other things - with a loop from the neck itself (or whatever it's called)

4. At first, we wanted to fill the balloons right on the street, connecting to the tap of the Sports House and bringing the hose outside - but the hose froze, we steamed it for an hour and a half, then we decided to fill it right in the toilet and carry it to the place in a wheelbarrow. This is more economical in terms of water consumption, and more comfortable in the warmth than in frost at -25.

5. Next is the most "sensitive" stage - freezing. Of course, the easiest way is to put it in the freezer overnight. But where can you find a freezer for 400 balloons? And how do you transport them to the street art site?

6. So we froze them right in the park, laying the balloons in the snow. We tried not to deepen them too much and to place them so that the balloons did not touch each other.

09

7. We filled the balloons for about two hours. During this time, the first batch became crusty. We left them for another 2 hours. When we arrived, we found that the balls were freezing perfectly on top, but underneath, where they touched the snow, there was water. Conclusion: in order for the balls to freeze faster and better, they need to be turned over after a couple of hours, or even better, reduce the area of contact with the snow as much as possible.
Having turned all the balls over, we decided to leave them overnight, covering them with snow from the kids.
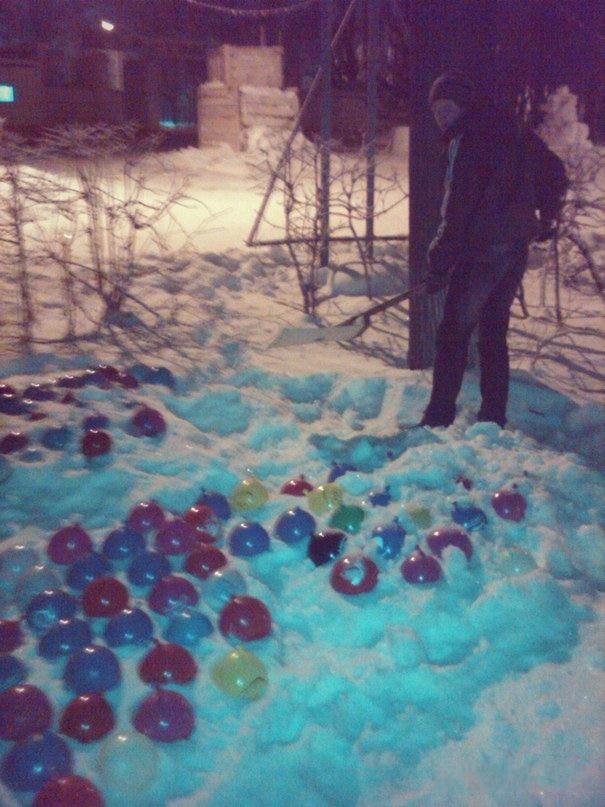
However, this did not save us - several young vandals remembered where they had seen a colorful carpet during the day and, having dug up the balls, began throwing them. Fortunately, the park workers drove them away in time.

8. Most of the balloons survived. The next day they started digging them out and, after keeping them in the cold for a while, removing the "clothes". The rubber comes off very easily - just tear it with a knife, keys or a stick. Some balloons never froze completely - as soon as we removed the "clothes", water poured out of them.

13

14

9. You can do whatever you want with the balloons you get. These are both wonderful self-sufficient decorations and excellent building materials. We chose to build a pyramid.
We secure the first level with snow - so that it does not slide apart.

We water each level - otherwise the structure will slide apart due to the unevenness of the balls.

It's a pity that we didn't have a normal camera at hand - we took the pictures on our phone. But not every camera, or rather photographer, will convey the magical play of reflections of lanterns and garlands on the edges of ice balls. And what beauty during the day.

It was only later that we were struck by the idea that the pyramid frame could have been made of snow, with balls just placed on the outside. That way the pyramid would have been 5 times bigger. Well, that's for next year.


