Photo report from the “handy” guys who made the buggies with their own hands!
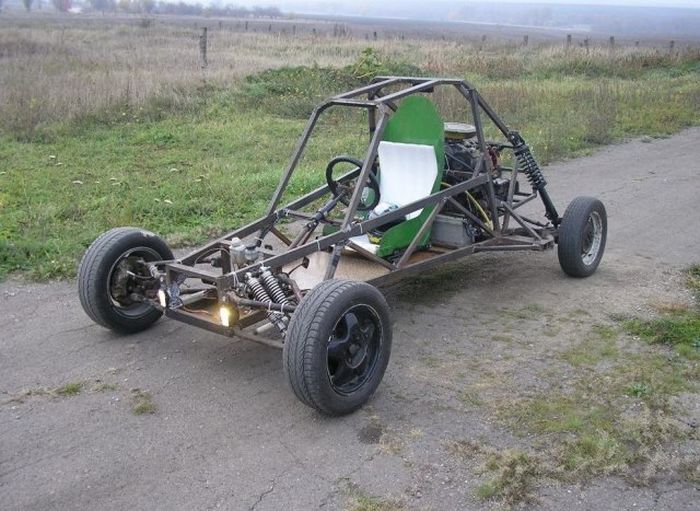
My friend suggested making a buggy, a real one in the right way smile.gif After thinking a little, I agreed to his provocation. My friend purchased 99.9% of the parts for the buggy, and I helped with welding, ideas, tools, space and, most importantly, company (I can’t do all this alone)
 So here is the uprooted motor with gearbox. The heart so to speak...
Start. This means, as usual, the soul demanded rational decisions, so the buggy from the Soviet magazine “Modelist Constructor” was taken as a basis, it was called AB-82, and had most of the spare parts from the world’s kindest motorized vehicle, ZAZ 968, i.e. Zaporozhets.
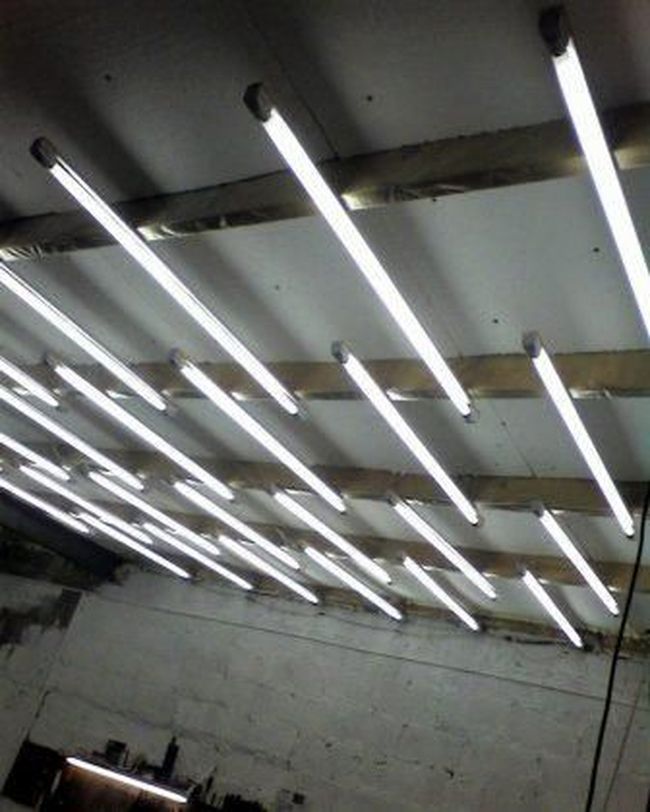
For some time we found tools, did a mega-cleanout in the garage and looked for a donor. Tools (the most necessary) were found. You can work in the garage (cleaned up, made the lights, etc.) Purchased a ZAZ 968, red rear-engine coupe.
So we chased the ghost around the city, it drives around, it’s alive. They cut it up in the garage (there is no photo of the cut-up, apparently we were very carried away by the process)
We arrived at the garage, cleaned up, made the lights, it seemed like decent, more or less working conditions... We bought ordinary iron profiles (profile pipe) at a metal depot and started sculpting with a welding machine, which means... Art
 The art grew, first the bottom was welded, here the drawings were 90% followed. The frame is made slightly larger than in the drawings.
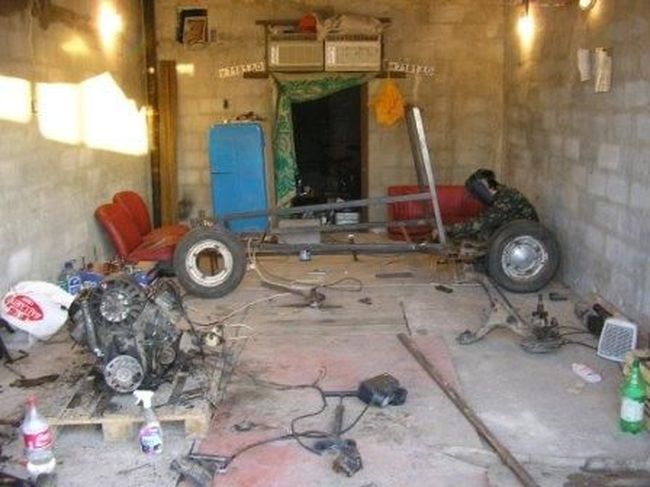

Somewhere along the way, a rear suspension appeared. These are original Zaporozhye levers with hubs, and on original “ears”, carefully removed from the donor body in advance. The opportunity arose to move into my garage, which we did. We worked hard to create light, order and beauty; nothing comes for free.

As it was

How did it happen?
Pay attention to the high-tech technology of painting walls (we thought about making them lighter, like beauty and light is reflected) The technology is like this, one paints chaotically in one place, the second in another, the paint suddenly runs out (sellers are such sellers... they promised that for the whole garage 10 layers is enough for a bucket... but really...) and that’s the end of the event))
The front control arms and suspension were made.
The lever pipes are rods from the rear suspension of a classic VAZ. With silent blocks.
The ears on the frame for silents are homemade from 2mm metal.
The ball mounts on the bottom are a piece of the VAZ front arm.
Ball vase of course.
On top there is a relay tip of a vase instead of a ball one.
The bushing for adjusting the camber is welded into the upper arm (the bushing was made by a turner)
The turner also made a spacer for the upper ball joint (they have different cones)
Initially, IZHP 4 shock absorbers were installed, but this is too weak an option.
Later they changed it.
So far there are some tires to roll around.

The suspension, it must be said, was not welded from scratch. The kinematics of the levers are measured in such a way that the contact patch of the tire with the road is always maximum. Checking the suspension travel. This is already a very interesting moment when the structure can already be rolled somehow! Joy like 7 year old children.

Fiery heart, engine i.e. Let's try it on. The engine and gearbox mounts remain factory, with minor modifications.

A general photo with a suspension and a homemade bucket made of 0.8 metal according to drawings from our wonderful Internet (what would we do without it?!)

Again, erotic fantasies on themes with a roof... Design and engineering (from the word engineer or fig?))

Time has passed. We chose how beautiful it would be.

Space gravitsap. The shot in between is meaningless and cool.


By the way, here's a closer look at the motor mounts. Just in case)

We started making pedals, fastening tanks and cylinders. Alas, there are no high-quality photos of the process left, either covered with writing or in between, like here. But the main thing is there is gas)) The steering rack is also fixed offhand. This moment is adjusted for a long time so that the balls in the steering rack are in a certain place relative to the suspension mounting lines. Co.
In other words, so that you would steer the car, and not it would steer you over the bumps. Steering rack OKA (1111) VAZ 2107 steering joints, very comfortable and for safety + VAZ classic steering ends.

The first descents from the hill, the steering wheel is on a stick with duct tape, there are no seats, there are no brakes, there is nothing... Don’t do this, it’s dangerous for everything)))) An ocean of joy, of course. The front wheels are normal, VAZ, the rear wheels are ZAZ (the VAZ is a temporary dummy for a photo, in reality only the ZAZ wheels are on the ZAZ hub)

Bottom. Because it's dangerous to ride without it. Sheet of metal, 0.8 in my opinion. Initially it was attached with self-tapping screws with a drill, but as practice has shown, they are not suitable for these purposes, they fall out from vibration, and are often cut off by the ground when jumping and so on. And then there’s the mystery of who will assemble them with wheels... Later, the bottom was welded with spots. By the way, from the start the project was cooked with electrodes. And with the move to a new home, the machine was created only with semi-automatic CO2 and 0.8mm wire. More convenient, faster, lighter, this type of welding has a lot of advantages.

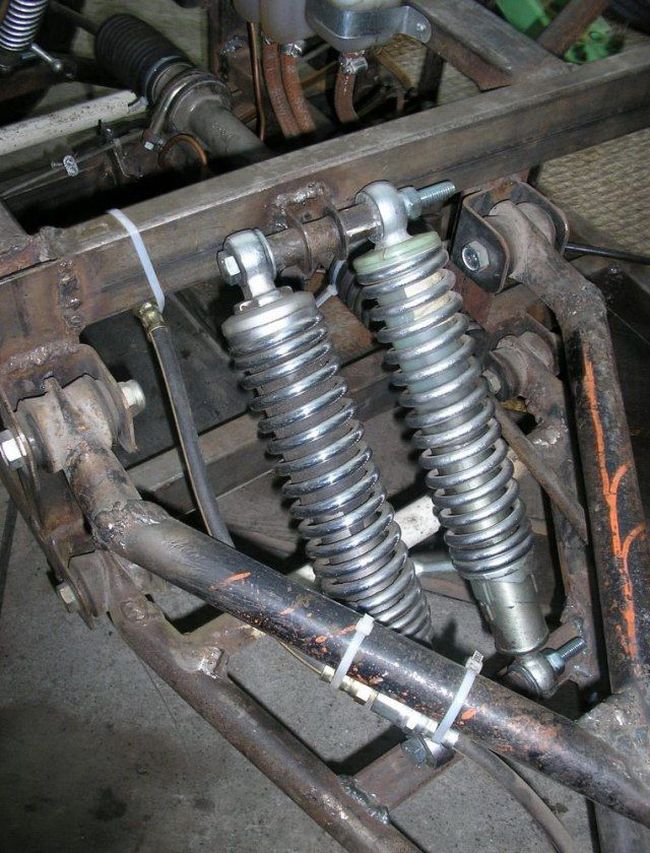
After the first tests, hopes for compact, lightweight shock absorbers dissolved. We put two of these on each side, it got better, we rode them for a while, but not the same. By the way, out of the corner of your eye you can see that there is a throttle cable, clutch and brake reservoirs, brake pipes and a high-quality steering rack. These kinds of moments require a lot of thought and creativity, so we forgot about the photo. There is linoleum on the floor of the buggy)) It seems like it was temporarily cultivated.
Somewhere along the way they screwed a generator to a VAZ engine. To be honest, the ZAZ generator is rather weak. By the way, they sculpted it interestingly. We welded the fasteners, went to get the belt, took it and tried it on - it didn’t fit a little. They exchanged, they arrived - it didn’t fit a little. They exchanged - they arrived - it didn’t fit a little. We cut off the mount, welded it, the belt fit)))) The charger is excellent.

Comfort)) Carpet))) But I must admit there is already a steering wheel and a lying unconnected (never before) tidy from ZAZ)

By the way, the rear suspension looks like this. Stand-ammo from various vases, inlaid solarium. The belt limits the suspension travel so as not to pull the axle shafts from the box and the shock absorber rod. The mounting lugs are the same homemade ones made of 2mm thick metal. The axle shaft is extended by a hollow pipe (you can’t do this, the results will come later)

Germ fuel tank, 5 liter canister, year of manufacture 1956! Excellently preserved! Later it will have a neck, a fancy cap, pipes, a fuel level sensor (float)

Gasoline, oil, brake fluid, sandwiches, everything. First trip to the cross track! Let me add that a VAZ carburetor was installed through an adapter, a “cut” air filter housing onto the carburetor, such as tuning with a focus on a lighter intake, a helmet was found, a brake light appeared, test headlights and ship toggle switches. Ignition, start, headlights.

