DIY subwoofer (51 photos)
One craftsman decided to make a subwoofer for his home theater with his own hands.
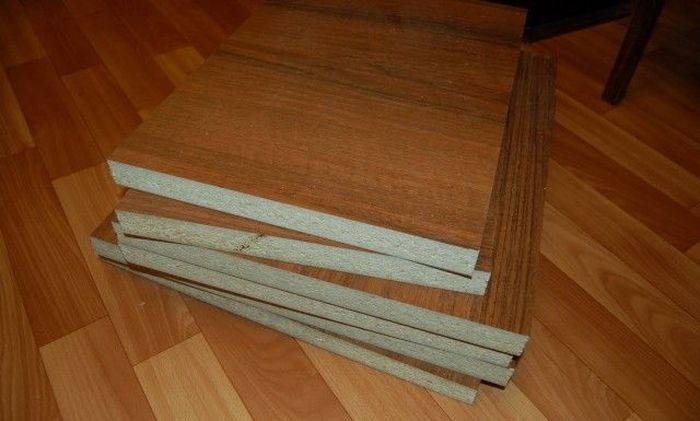
My first steps in the field of electrical engineering and after both projects turned out successfully, I had a desire to assemble something more complex. My gaze settled on the subwoofer. I wanted to experience all the delights of special sound effects when watching films. The first thing I did was decide on the power - up to 100 watts is more than enough for the room. Well, then search for drawings and select a woofer. While the speaker and phase inverter were arriving by mail, I started selecting materials. At a nearby furniture company I found this 30 mm slab in the waste and cut it to size for a hundred rubles. Since the dimensions offered on the website are designed for 19 mm MDF, we had to recalculate a little so that the internal volume remains unchanged.
We put together a couple of self-tapping screws to assess cutting errors, there were none

We make markings for milling the speaker and phasic

We are preparing a hand router and here are my cutters for crafts, everything is done exclusively at home.

Since the router requires a compass for high-quality milling, we had to make one from what we had

In the end, I got this thing, with the help of this compass I can make circles with a diameter of 60 mm

We begin to mill, not forgetting to connect the vacuum cleaner

This is how beauty turns out)

The speaker and phasic have arrived, let's try them on

Milling for terminal

Trying it on again

Now we chamfer from all corners

The holidays came and he and his sub went to visit their parents in the village. There, the walls of the subwoofer were glued together with polyester resin (somewhat similar to epoxy, but it dries in 40 minutes) and tightened with long self-tapping screws

After the holidays I started puttingtying the body. At first I just wanted to seal the bolts. But then I decided that if I did it, I would do it well, so I would go over all sides with a large spatula so that the plane would be perfect. After sanding, I applied a finer putty on the plastic.

After puttying, everything is sanded; small flaws are revealed with developing powder. Next, primer, dry for a day, then sand again. The metallic base is applied, dried and coated with auto varnish. As a result, we get such a beautiful body

And a couple more types

And evaluate the paint job up close)

Let's put the speaker on and everything seems fine

We glue the inside of the body with this anti-resonance material. Some kind of bitumen-based foil

Also, after we glue it with such damping dense mats

Now it's light and warm inside

screw everything onto the body

Next was the choice of turning the tenons. but again it’s inconvenient to move the sub with them, you need to put something under them so that the linoleum doesn’t tear, I went to a furniture store and bought iron handles covered with something and screwed them on

This is what it looks like with them

In principle, everything is finished with the subwoofer, now it’s the turn of the amplifier. There was an idea to make the sub active and stuff everything inside, but I don’t really like this kind of performance, so there will be a separate amplifier for it. Since earlier I was able to successfully assemble an amplifier for the first time in my life using the TDA7294, I started building it into a bridge using the same microcircuits. But after reading that such an amplifier is designed only for an 8 ohm load, I began to choose a transistor amplifier that was more complex for me. Having sifted through a bunch of information, I chose Lanzar, and here is its diagram. Power can be obtained from it 200W or more

We are preparing the board under LUT, I will correct all errors with nail polish)

Tinkering the paths

We collect all the details, the main thing for me was not to make mistakes

Since the sub operates on low frequencies, a low-pass filter (LPF) is needed. Of course, if the sound card has a separate sub output, you don’t have to do it. But I was no longer looking for easy ways) Filter circuit using op-amps. The low-pass filter has a volume control, a cutoff control, and a smooth phase control

Low pass filter board

LPF assembly

With the filter, too, not everything is so simple; it needs stabilized power supply. making a stabilizer here is its diagram

Stabilizer assembly

We check everything is working, set the quiescent current on Lanzar. Everything works, everything sings

we check the low-pass filter regulates everything, everything works, I’m so happy) The stabilizer board had to be simplified a little, thanks to knowledgeable people

Now powering the amplifier, I had a test transformer TP-100, with 20V secondary, but this will not be enough. I had to strain everyone I knew who had a tube amplifier lying around. And lo and behold! I found one and pulled out a burnt-out TS-180 trans from it. I had to learn how to wind transformers. I rewound the primary with 500 turns and the secondary with a voltage of 27V

Everything worked out, again this was my first time doing this

We begin to create the amplifier body, as always, from the corners for the frame

let's try on the radiator

My precious aluminum went to the first amplifier, let's move on to plywood))

We pass the edges with a router

Back view

Further along the knurled pattern, putty, sandpaper, prime, etc. until varnishing

The finished result

And further

Let’s figure out how they fit together). Conclusion - not bad!

We collect everything into the amplifier, figure it out and secure it

The low-pass filter had to move the controls apart because they were too close, it was inconvenient to rotate the knobs

We place the amplifier on polyurethane self-adhesive legs

I forgot to add that I inserted the AC protection board and placed the diodes on the front panel, red will light up if a constant voltage appears at the output of the amplifier, green will light up for 3 seconds while there is a turn-on delay

And one last thing. In conclusion, I will say that the power of the subwoofer is through the roof! The bass is very clear, punchy and elastic. There is no wheezing or farting anywhere near it. The only drawback of the sub is that you will have to take all the furniture out of the room along with the baseboards, everything around vibrates! But watching a movie or listening to music will be a pleasure. I recommend repeating it, I listened to the subs in the store, up to 10-15 thousand nothing plays even close to that in the store. And not because the sub assembled with his own hands, but because everything was selected optimally in this project. Thank you for your attention))