DIY wooden lamp (38 photos)
At work, I have to communicate a lot with people and work with my head, and the results of such work are not always obvious. Therefore, I chose a hobby for myself so that I could work with my hands, silently, and so that the result would be obvious. With such requirements, carpentry is an excellent option.
I want to share my next project with the Fishkovites.
For a long time I had an idea to make a wooden lamp.
I came across the concept of the lamp on the Internet and modified it a little to my liking. I think it turned out cute.

Before starting, I want to say that carpentry is quite affordable these days. All my machines and tools turned out to be no more expensive than one ATV, or a sports motorcycle, or a couple of trips to exotic countries, or a couple of top-end laptops, and, even more so, they are several times cheaper than a trained off-road rogue (and an unprepared one too) and other diving with customizations - there are a lot of passionate people around us. I'm sure many people have more expensive classes.
I also keep a blog (indicated as a source in the description of the photos), where I write articles as crafts come out. There are my other projects there too.
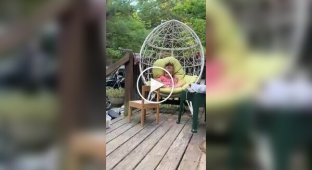
It all started with a paper model, which took a lot of time. Thanks to playing with proportions, we managed to achieve a good result. The photo shows one of the intermediate options.

Next, using the paper model, plywood templates are made. Then the parts of the future lamp will be made using these templates. The templates are made of 20 mm plywood. It has fairly hard ends that will not be deformed by strong pressure from the bearing of a copy cutter. The production of templates must be approached very carefully, because the quality of the final product depends on their quality. It took almost a whole day to adjust and polish the templates.

Now about the choice of material. There is a relatively cheap material - pine. It is a light wood, usually yellow in color, which is very easy to work with. But she has one serious drawback - she is soft. It is so soft that you can leave a dent on its surface even with your fingernail. So fu, fu, fu.

I decided to make my project from harder, nobler and more expensive types of wood - ash and oak. In addition to the fact that this wood is already relatively difficult to process, I also took complex pieces of complex wood - wood with a large number of knots and internal stresses. Usually carpenters try not to deal with such wood and it is used for firewood.
2017 has been declared the year of ecology. This will be my contribution to the conservation of natural resources: instead of throwing them away or burning them, I will use them in my products. Moreover, tangential cutting of wood in this project will look very advantageous.

First, cut off the bark and cut out the knots.

Next we fugue. This is done on a special machine shown in the photo. Jointing makes the surface of the board perfectly flat.

At the end, we run the blanks through a surface planer.
In the previous step, we jointed the workpieces - that is, we made one side perfectly smooth. Thicknesser processes the second side, making it perfectly parallel to the surface. If the first one is smooth, then the second one will be smooth. Thicknesser also allows you to get many pieces of the same thickness.

Ash is beautiful! This is probably my favorite wood. It has a pleasant color and pattern, pleasant heaviness and nobility.

From the resulting planks we cut out the details of the future lamp. To do this, we mark out the parts using templates.

And use a jigsaw to cut them out with a slight indentation.

Now we need to process the edges of the parts on the milling table using plywood templates. To do this, you need to securely fasten the part to the template. The best option is self-tapping screws. But self-tapping screws leave marks. All that remains is to use double-sided tape.


Next, you just have to process the part with a copy cutter

Unfortunately, sometimes workpieces contain microcracks that are invisible to the eye. They lead to chips. About 20% of my workpieces were damaged in this way - yes, quite a lot.

After this, each part is sanded separately. I used 120 and 180 grit sandpaper. Another nice property of ash is that it sands well.

In order for the lamp to be more stable, the future dog’s paws should be slightly spread apart. To do this, they are slightly beveled at the point of attachment to the body. I made the bevels using a special homemade carriage.


I just can’t manage to get a drilling machine in my workshop, although I’ve been dreaming about it for a long time. Therefore, while I’m working with a hand drill, we make holes in the parts of the future lamp for attaching them to each other. It is better to make holes by stacking the parts - then they will fit better together in the final product. Do not forget to place a block under the exit hole so as not to damage the table and the drill does not tear out the fibers of the part when exiting, leaving ugly edges.

The lamp body is almost ready. All that remains is to make the lampshade. To make the lampshade, I used 6 mm MDF, veneered on both sides with natural oak.

I cut out the details of the future lampshade using another homemade carriage, which allows you to accurately set all the corners.

The lampshade will actually be a box with six walls, one of which is recessed. This design will allow you to hide all the ugly electrical parts and make the lampshade quite durable. In addition, thanks to the use of veneered MDF, all parts can be reliably glued together without fear of warping. We make grooves for gluing on the milling table.

It wouldn't be a bad thing in the finished product if the dog's head could turn. To do this, I made a simple hinge. We glue a plywood block with a hole in which the self-tapping screw can move freely onto the lower part of the lampshade.

At the upper end of the neck blank we drill a hole of smaller diameter into which a self-tapping screw can be screwed. This drilling allows you to avoid possible splitting of the neck blank while tightening the self-tapping screw and to precisely set the place where it will be installed.

Next, we screw the self-tapping screw through the washer, thus connecting the parts to each other.

We select the tension of the screw so that the head can rotate, but not dangle.

After making the hinge, glue the lampshade

In general, the dog lamp is ready. But there is one more important stage left - the finishing coating. A bad coating will easily ruin all your efforts. The appearance of the product, its presentability and, along with them, your image among others depends on it. Therefore, on carpentry forums, coating issues are perhaps even more discussed than the actual processing of wood.
Since my project focuses on environmental friendliness and naturalness, ordinary varnish would not be entirely appropriate here. A special oil for impregnating wood is much better suited. Judging by the description on the can, it is made from natural flaxseed oil - just what you need!
Here we need to make a small digression about oils:
Firstly, the varnish “sticks” only to the top layer of wood, while the oil penetrates the wood deeper and polymerizes there. It does not dry out, but creates a solid structure that is resistant to solvents. Therefore, the oil protects products exposed to weather conditions much more effectively. (UV destroys the top layer of wood cells and along with it the varnish coating. The surface coated with oil is more resistant)
Secondly, repairing a damaged coating in the case of varnish requires much more effort than in the case of oil. In the latter case, you just need to apply a little new oil with a brush.

Applying oil to carpentry should definitely be included in the UNESCO World Heritage List. This process gives peace on the verge of meditation. Wood comes to life right before your eyes - it acquires a very pleasant shade, its structure is emphasized. The product looks absolutely incredible!
A very important point - always read the manufacturer’s recommendations - he knows more about his product than you do and is very interested in your success. So, it is recommended to apply oil with a brush or rag that does not leave lint. Twenty to thirty minutes after application, it is recommended to wipe off any remaining oil and leave the product for a day. After a day, the procedure can be repeated for better results. After applying the last layer, if possible, do not subject the surface to stress so that the oil completely polymerizes.

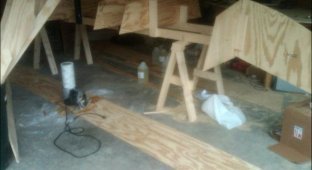
To prevent the parts from getting in the way during impregnation, hang them away from the workbench.

After the coating had dried, I assembled the electrical part.

I used lamps with a GU5.3 base. The choice of lamps with such a base is huge. From all the variety, I chose an LED lamp (so as not to get too hot) with warm light.

Ready. The dog turned out even better than I expected.