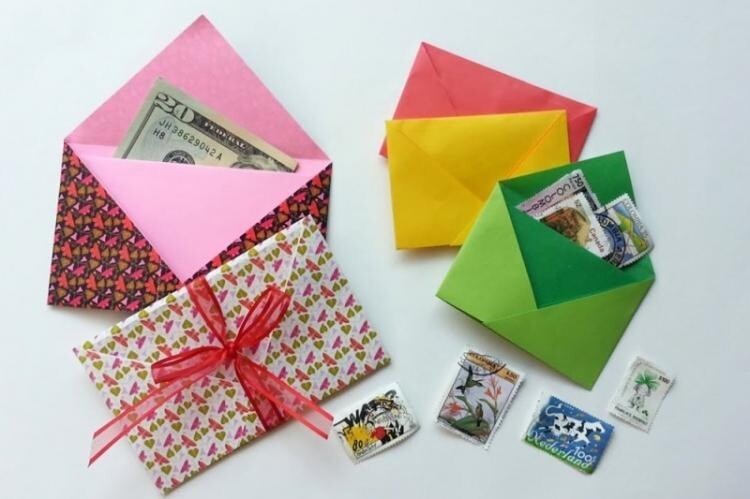
9 simple ideas on how to make an envelope from A4 paper (20 photos + 1 video)
The card has already been chosen, the letter has been written, but you still don’t know how to package it beautifully? The same type of mailing envelopes are not very good, and sometimes they are not the right size. The search for something new turns into a real challenge. What if we say that there is no point in going through it? After all, at any time you can make a beautiful envelope from A4 paper with your own hands!
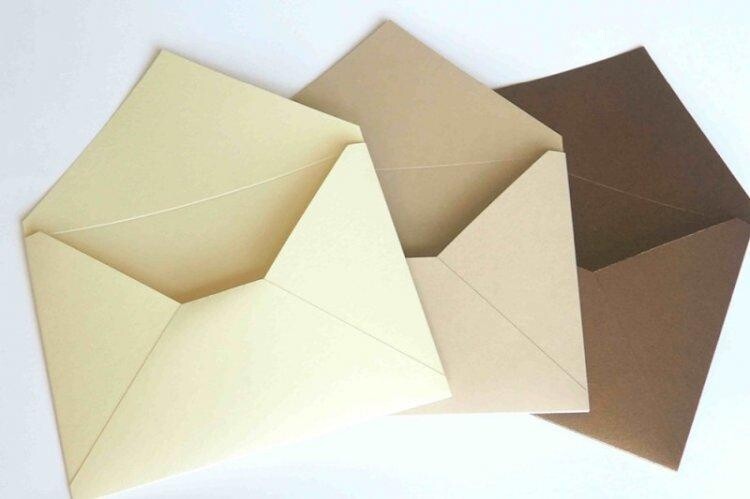
1. Classic envelope

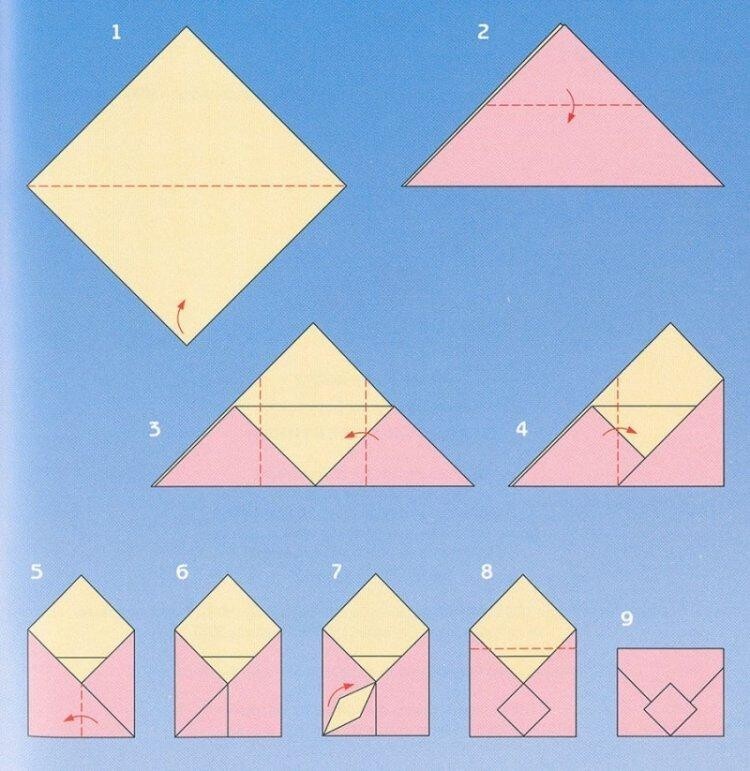
Take a sheet of paper, mark the diagonals and bend the side corners towards the center. After this, bend the bottom part so that its corner protrudes slightly beyond the middle - you can use the dimensions of the postcard as a guide. And then lower the top part so that its corner just ends at the base of the envelope. With this scheme, it is most convenient to change the height - it is determined by the bending places of the upper and lower valves.
2. Template envelope

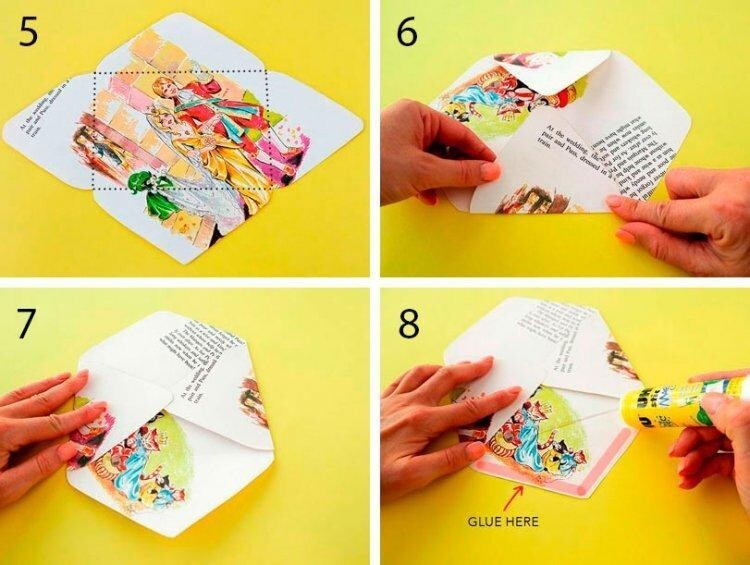
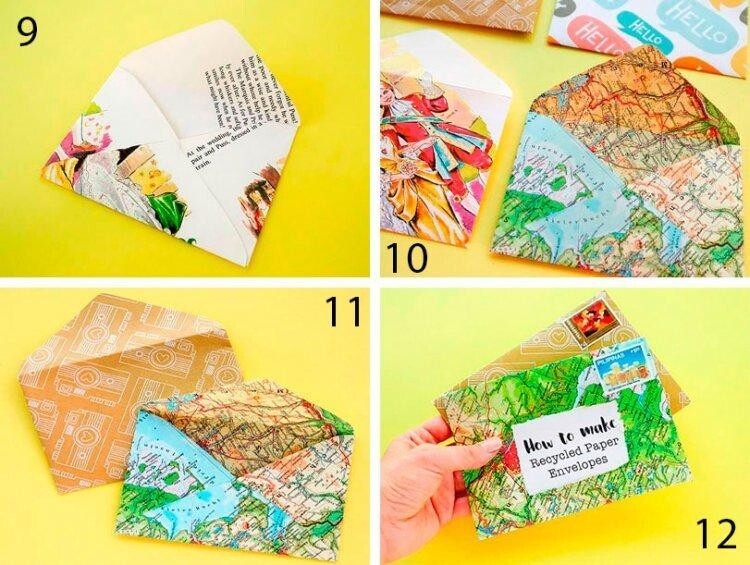
If you want a neat envelope with thin taped seams without large angular flaps, use this template. Transfer it to A4 paper, cut it out and glue it - nothing could be easier! Or you can take some interesting material - pages from glossy magazines, newspaper sheets, a map, even a coloring book.

3. Envelope with a center

The neat diamond shape in the middle is great to decorate with a design, sticker or print. This envelope is easy to open and close without glue, so it is convenient to store all sorts of small items. But in fact, the scheme is practically no different from the classic one, so you won’t have any difficulties.
Bend a sheet of paper diagonally and bend the top triangle - it should rest against the base from below. Fold the sides of the envelope and place them on top of each other so that they match. Bend the lower right triangle to the other side and straighten it into the central diamond.
4. Envelope made of rectangular sheet

First you need to make a parallelogram out of a rectangle, as in the diagram. Turn it around so that the wide diagonal of the rhombus is its horizontal line. And then proceed according to the classical scheme - bend all the valves exactly to the center.

5. Envelope with a fold
This one differs from the classic envelope made of A4 paper by a straight line in the middle. To do this, mark a paper square, as in the diagram, and traditionally bend it to the center of the side. Fold the bottom triangle exactly to the center, not going over the side flaps. Tuck its sides and form a trapezoid, and then secure the sides with the resulting “tongue”.

6. Square envelope

Cut out a square of colored paper and fold the first flap, going a little to the middle, and then bend the corner at the top along the central horizontal line. In the same way, form the second and third valves so that they overlap each other in turn. The last fourth part will be the closing part - all that remains is to seal or seal the envelope in the center.

7. Assembled envelope made of circles

Cut out three colored circles from cardboard or thick paper - the main thing is that they are the same size. Fold each one in half and place them overlapping each other on the table. Glue them together in the center and bend the upper parts in the opposite direction - you see, nothing complicated!

8. Envelope-heart

Cut out a large heart from thick wrapping paper and turn it over with the colored side down. Fold its edges like side flaps, turn it over again and fold the bottom, like a classic envelope. The bottom corner of the heart will become the top flap of your brand new envelope.

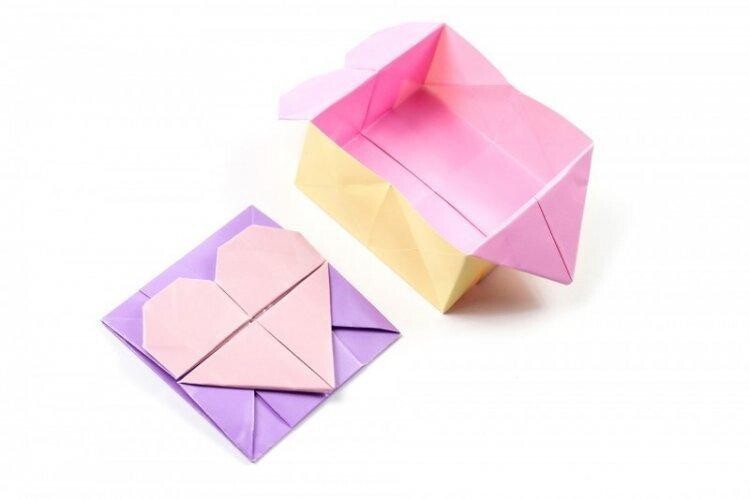
9. Envelope box

Take a large square of thick paper - preferably double-sided packaging. Mark the diagonals, central vertical and horizontal with folds. Fold the corners to the middle, folding them at the same time to get a small square - according to the diagram.
Turn the small square over with the opening side up and fold one triangle over. Fold two corners of the bottom layer to form a heart. All that remains is to straighten and shape the envelope-box, and then carefully tie it with ribbon.
Video: A4 paper envelope (origami) - step by step