Самоучитель по Фотошопу (7 фото)
Категория: Сделай Сам
1 марта 2007
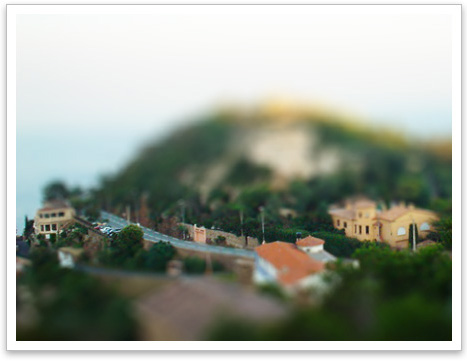
It doesn't take much to fool the mind of the viewer, but there are a few basic rules you can follow to help convince your audience that they're looking at a railway set rather than the real world; see the section on picking the right photo at the bottom of this page. You'll need a copy of Photoshop CS or later to follow this tutorial.
STEP 1 SET GRADIENT MASK
Open up your chosen image, press Q to switch to Quick Mask mode, then click on the Gradient tool. Set the colours to the default black and white by pressing D, then switch them around by clicking on the double-headed arrow next to the colour chips. Next, set up the gradient as shown above. Make sure you select the repeating gradient type – fourth icon along, looks like a cylinder.
STEP 2 APPLY MASK
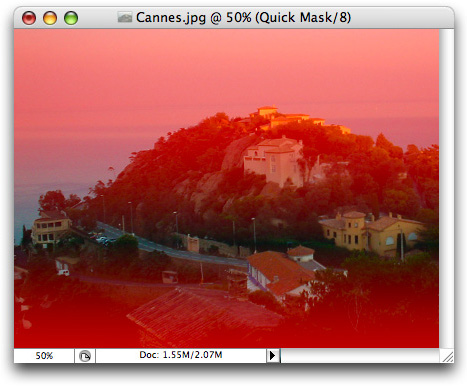
Choose where you want the focal point of the photo to be – usually about halfway between top and bottom – and click and hold at that point. Drag the line of the gradient tool upwards, then release it towards the top of the frame; it doesn't hurt to be a little off the pure vertical. You should get something like what's shown above. Press Q again to switch back from Quick Mask mode.
STEP 3 APPLY LENS BLUR
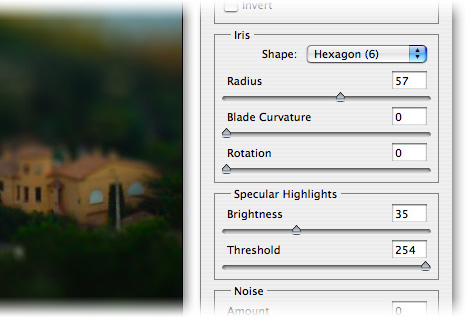
Chose Filter → Blur → Lens Blur to bring up the Lens Blur filter pane. It can take a little tinkering to get the settings just right, but try the above values as a starting place. The Iris section controls the shape of the virtual iris in the lens; a hexagonal iris is most normal, and you could try rounding out the sharp corners of the geometric shape using Blade Curvature. Rotation controls the angle of the hexagon. The Specular Highlights section adds little glints to bright areas, but it's usually not a good idea to drop the value of the Threshold much below 250. Click OK to apply the effect, then clear your selection.
STEP 4 ADJUST CURVES
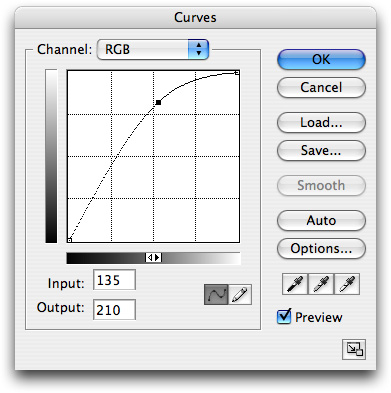
To add to the feeling of artificiality, bring up the Curves palette (go Image → Adjustments → Curves) and drag the RGB curve to something like the example above. It blows out the colours in the image, and makes it look more as if it's built from polystyrene and lichen.
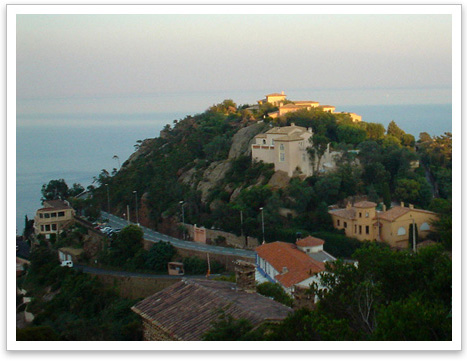
NOTES ON PICKING THE RIGHT PHOTOGRAPH
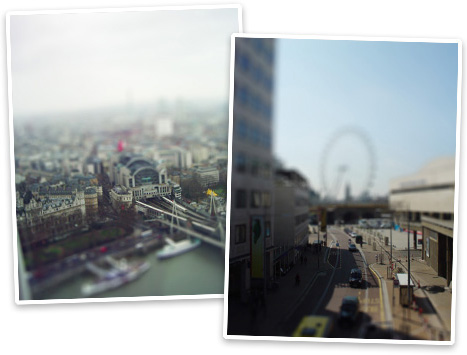
We're used to seeing models from above, so the mind can more easily be fooled by pictures taken looking down than those looking up or at eye level. But almost as important is the lighting in your photo. Models are usually lit by a lamp, so you'd expect to see sharp, directional shadows and bright, almost harsh light. That's partly why the picture of Charing Cross station (left), with its dull, omnidirectional light, doesn't work as well as the picture pointing towards the London Eye (right). Plus, building the model on the left would be the work of years, so the mind tends to be a little more sceptical. Below is the original of the photo used in this tutorial.